Digital landscape painting
This project involves creating a digital landscape painting with mountains and trees. Below I describe in brief detail how I created this composite image using photoshop and a Wacom Tablet to paint in each layer. There are many techniques too numerous to mention here about how to make digital paintings in Photoshop. It is my hope that you will gain some insight as to how to begin. Best viewing of this page is on a wide screen format.
I open a new file in photoshop, and set the image size to 300 by 300 pixels and the resolution is set to 72 pixels per inch.
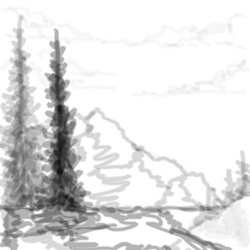
I begin by sketching out the basic composition, using a brush tool set at various sizes in photoshop at an opacity of 30% black.
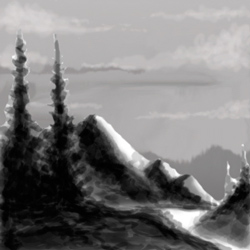
The next step is to begin by adding a " new layer ” to the image and blocking in dark and light values, using a soft brush at various opacity settings of black in photoshop.
Next...Use the smudge tool to blend in values. Fill in areas where you think the darkest tones are, then erase areas at a light opacity to help clarify lighter areas.
What are light values? Put simply, you are trying to create where light, shadow, reflected light, and highlights are. I suggest using black as your base color, and erase at a light opacity where you think areas should be lighter.
Stick with black as your color for now. Use the eraser tool at an opacity of 100% at a brush setting of your choice, to clean away areas if needed.
After all light and dark values are established, I use the smudge tool in photoshop at various sizes and strengths to smooth out and define shapes such as the trees. I use the eraser tool at various levels and sizes to define shapes and forms.
Think of the eraser tool as a cookie cutter to trim away what you do not need. Insure you “stay” on the correct layer while you are working. Always name your layers because it helps you stay organized while working.
Seeing the composite view
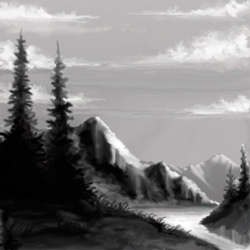
After I am satisified with the overall look of the image composition and light values, I add a “third layer” in photoshop and begin to paint in color.
I set the layer mode to “Color” so as to not allow full saturation. The brush tool I use, varies from 25 to 100 pixels in size, and is set at various opacities while working.
Try to limit the amount of color you use, so you don't muddy the water per say. I find it useful to save a copy of the file I am working on, on a separate or external hard drive space, so I can always go back to the last saved version just in case.
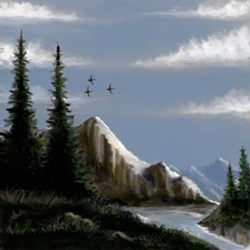
After all the forms and colors are blocked in, this is the final result. Like any artist, I am never satisfied with just one version, so I always go back to a previous version I saved, so I can create another variation.
I add hue and saturation effects to help color levels and then use the Save for Web option in photoshop. I prefer to save images in JPEG format using the “Save for Web” option in photoshop, but you may save images in other file formats available.